Final Images and Printing Process

These are the images that I have chosen for my final images.

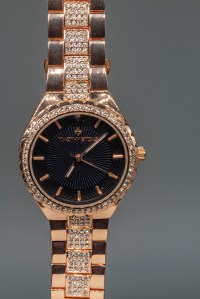
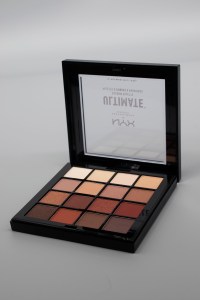
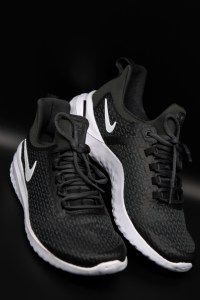
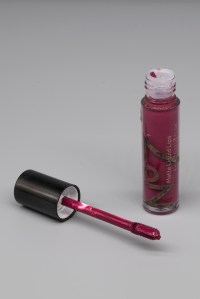
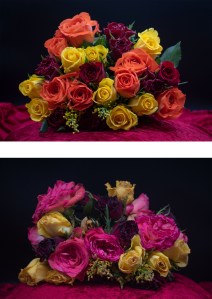
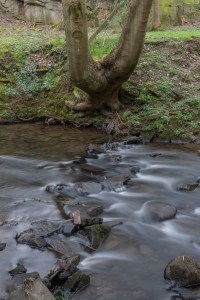
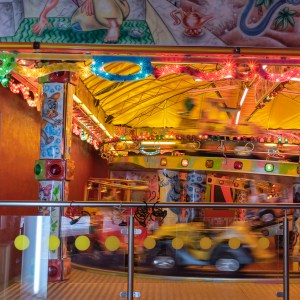
  • Row 1: Objects of Desire
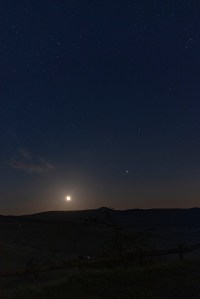
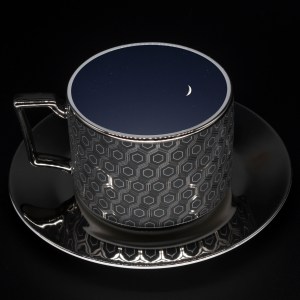
  • Row 2: The Enigma of Time
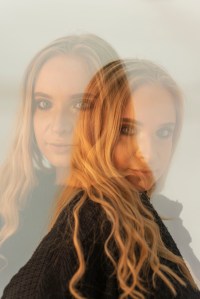
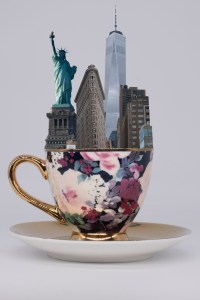
  • Row 3: The Constructed Image

I chose these images because I feel that they are the four most successful images from each category, and that they all have high impact. I decided to stay away from strict themes this semester to allow myself to experiment widely with different photographic processes and techniques, and avoid repeating images from the same shoot. I think that I have a wide variety of commercial photography, location shooting, studio shooting, night time photography, and two photographic processes (multiple exposure and photomontage) that I have discovered and expanded my skills with during this module. I had never shot multiple exposures before and found this really fun to experiment with. I also found creating digital collages was fun as it takes me back to my studies in Graphic Design, and it felt great to incorporate both my interests into my projects. If I could change one thing it would be that all the images in a set were in the same orientation (e.g all landscape, portrait or square) rather than mixing within a set, however this was beneficial for my images to remove unwanted distractions or white space.

The printing process was quite straightforward as I had remembered what to do from last time. The papers I used were A4 FB Royal Gloss 310gsm which I used for most of my images, as I really liked the glossy appearance and the way it makes the colours really bold and punchy. I also used A4 FB Matt 285gsm for a couple of images; the Blackpool multiple exposure and the long exposure of the river; because the matte finish gave a calm feel to the images and colours, which is already expressed in each image. I tried printing the image of the stars and the ageing flowers onto matte paper, but the results were terrible and unflattering as the colour gamut wasn’t as broad and the blacks were very dark and didn’t mix well with brighter colours. I then printed them onto glossy paper and they were much more effective and closer represented what was on the screen. I was unsure whether to use the image of the stars with a warmer or cooler colour temperate, so I printed both to see how they turned out. The one with warmer, orange tones was full of noise and of low quality, whereas the one with cooler, darker, blue tones was sharper, the stars were more visible and overall looked more impactful. I was advised by Dave that this is because orange is part of the red colour channel, which holds much more noise than the blue colour channel, which is why the level of noise and quality of the image varied so massively. Therefore, I kept the cooler toned image as my final print.

Long Exposures of the Stars – VISUAL DEVELOPMENT – Enigma of Time

Another idea I had was that I could show the effect of time in my images by using the most important tool I already had – my camera! The longest exposures I had done so far were those of about 5 seconds of the moving water in the last shoot, but I wanted to challenge myself even further by trying to capture the stars in the night sky. I knew that this would involve a much longer shutter speed and of course my tripod, and that maybe it was a big challenge with a chance of failing, but nevertheless I wanted to give it my best shot, and I had always aspired to take beautiful photographs of the stars and the wonders of nature!

I did my research before the shoot and found out that an exposure of around 20 seconds or more would be ideal to capture the light coming to earth from the stars. With this in mind as a starting point, I was then able to figure out the correct aperture and ISO based around this. I chose another local location called Tegg’s Nose, as I knew this would be the perfect place to access by car with a sturdy car park to place my tripod, and is probably the closest place to home away from the majority of light pollution and therefore safest to access in the early hours of the morning, when the sky would be the most clear and the majority of lights would be out as people slept. The biggest challenge I found during this shoot was focusing the camera; I experimented with both autofocus and manual focus, but it was impossible to find a star to focus on with my camera facing vertically upwards towards the sky, and the sky completely black on the viewfinder. To resolve this, I faced the camera towards the hills where I could still capture the night sky and the stars in the top half of the image, with some landscape and nature in the bottom half and the moon as my main focal point. This gave the images some foreground interest, adding depth and layers so there are more elements for the viewer to see and keep them intrigued. Although most of my images were out of focus, it was fun to keep experimenting and figuring out how to resolve the issues that I faced. I attempted to use the car headlights and the torch on my phone to find a focal point, but unfortunately these did not work. Next time I would take along a speed light to illuminate the elements in the foreground. I was also advised by Dave while editing and printing post-shutter that the gradual change in colour along the horizon line was in fact caused by light pollution from the nearby towns and city of Manchester, and that the reason the printed versions with an orange/red colour temperate were of poor quality with lots of noise, was because the red colour channel holds more noise. Whereas the prints with a blue colour temperate were a lot clearer with vastly reduced noise, because the blue colour channel does not hold noise in the same way. This was very useful knowledge to apply to the printing process and any future shoots of this nature.

Ingersley Vale – VISUAL DEVELOPMENT – Enigma of Time

Next, I wanted to try photographing moving water again for this assignment, as I really like the white, ‘cotton’ type effect that is produced when photographing moving water with a slow shutter speed, and one of the main areas of photography that interests me is landscapes and nature, therefore I wanted to improve on my last attempt.

This time I took a walk in my local town of Bollington in search of a river called Ingersley Vale and the waterfall that I had read could be found up there. I thought that this could be a wonderful photo opportunity, especially now I had learnt the importance of a tripod when shooting moving water and how it would give me a clean, crisp background in the areas with no movement, as hand holding would not be sufficient enough. Walking along the path, I found a “waterfall” but with nothing more than a trickle of water! And so I continued my walk to find something way more powerful; later coming across the vale and the river flowing through the luscious green Cheshire fields. I set up my tripod near the bridge as this was where the water seemed to be flowing the fastest, and I thought the bridge could also become an interesting element in the images. I experimented with shutter speeds between 3 and 5 seconds, way longer than the 1/8th of a second that I tried using on my first shoot in Eyam. This gave me much more motion blur in the water, closer to the effect that inspirational photographers such as Liza Dracup had achieved in their work, which is what I was after. I experimented in different points along the river to find the most successful place, incorporating the trees, bridge and surrounding nature to add more depth to the images. My images are below:

Liza Dracup – RESEARCH – Enigma of Time

“Dracup is well versed in the history of photography (and the history of art) and subscribes to a different conception of what the camera can do. Her pictures – photographs seems too narrowly descriptive a word for them – are not about capturing a particular moment in time but about timelessness. Her focus is less on something fleeting … and more on the long afterlife of places, plants and animals.”

– Michael Prodger

Landmarks exhibition catalogue
Mercer Art Gallery Harrogate 2016

Liza is a landscape photographer whose work draws on the British landscape, often focusing on the distinctiveness of the woods, rivers and wildlife of West Yorkshire where she grew up. Her photos place an emphasis on the extraordinary properties of the ordinary, and reveal hidden or unseen aspects which lead to a more informed, comprehensive and enriched idea of the northern landscape and its history.

In her series Sharpe’s Wood, the images are only shot between the hours of sunset and before sunrise, which enables them to capture the very essence of photography – time and light. Since the human eye cannot see very well in the dark, Liza uses the camera to “make the invisible visible” and this becomes our tool for seeing in the dark, as the camera understands more than us about light, or the lack of it. The actual location of the woods isn’t as important – they could be any woods, anywhere in the country, and our own sense of memory will determine how we respond to the images, dependant on whether we are familiar with the location or not.

Chasing the Gloaming (2011) is a series she produced in response to the moonlit oil paintings created by legendary artist of the Victorian era, Atkinson Grimshaw. The images depict rivers, woodlands and the Yorkshire coast as places that are ethereal and otherworldly, thanks to the use of the fading light that comes just after sunset and just before dark.

Funfair – VISUAL DEVELOPMENT – Enigma of Time

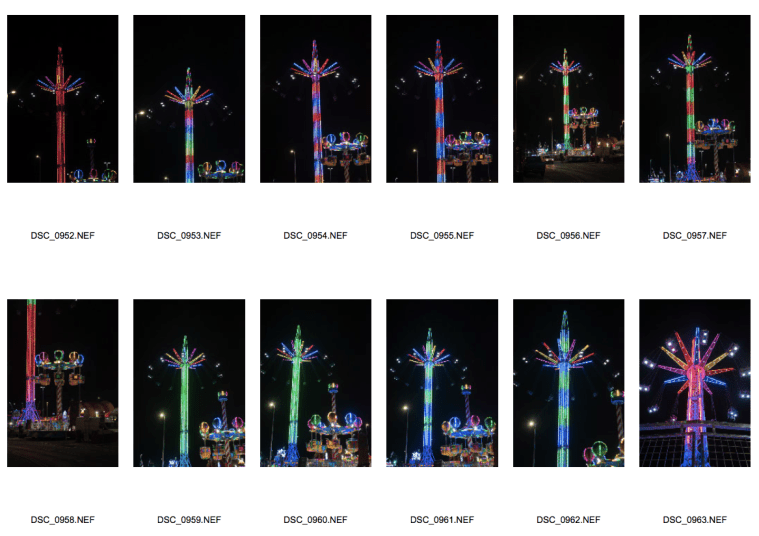
A few days after the Blackpool trip, a travelling funfair was set up at my local train station, an event which happens annually and the children and adolescents in my town always look forward to it. I couldn’t believe my luck and thought this would be a brilliant opportunity to shoot the movement of some rides that I didn’t have chance to do in Blackpool! I decided to do the shoot once it had gone dark because the light trails would make the movement and the passing of time in the image much more prominent, in comparison to the photos I took in Blackpool in the daylight where the movement was more subtle in the image and may not be noticed in some of the images without being pointed out. Unfortunately luck wasn’t exactly on my side again, as the selection of rides was quite small and poor, with most of them being packed together so there wasn’t much room to get a good angle for the images, or there weren’t enough lights on the rides to visualise the movement and accomplish my vision. There was also a large police presence due to an incident with some adolescents, and so I had to keep my distance and shoot the tall swing ride that was there as the main subject. The event was popular with a busy main road located opposite, meaning it wasn’t safe to put up my black tripod in the dark, so I took some handheld shots and tried to make the best of the situation. The bright, colourful lights look effective against the black sky, however it was hard to capture the movement because I couldn’t lower the shutter speed enough to capture it effectively. It was however productive to try and shoot in low light conditions and helped inform me how the exposure must change in such conditions. With such little luck shooting rides and attractions, I decided it was time to photograph other subjects that may give me a more successful outcome.

Screen Shot 2019-04-07 at 17.12.22

Blackpool Shoot – VISUAL DEVELOPMENT – Enigma of Time

Myself and one of my peers were discussing our assignments and we both decided that Blackpool would be a brilliant location to take some photographs for The Enigma of Time assignment. With the seaside resort typically being very popular with tourists, we figured there would be many photographic opportunities to capture movement; my initials plans were to put up my tripod along the promenade and capture the many people walking along the seafront, with the camera on a slow shutter speed to achieve motion blur with the background staying sharp. I also wanted to capture similar images of the fairground rides and attractions in motion along the piers. Another reason for choosing Blackpool in particular was that we were both inspired and intrigued by the work of Martin Parr and his satirical images of working class people enjoying their holidays at similar seaside resorts, and we also wanted to capture the essence of British seaside resorts in our images and maybe even experiment with a similar documentary style to Parr.

So on 18/03/19 we caught the train to Blackpool North station and embarked on our seaside photography adventure. Having kept an eye on the weather forecast the week before, we were disappointed to find that when we arrived it was raining – hard – throughout the entire day. This was concerning because we had planned our shoot and didn’t want to damage any of our camera equipment, but also because there was hardly a soul around or along the promenade, which was an essential ingredient for the images we wanted to capture! We decided to begin by exploring one of the indoor amusement arcades for photo opportunities while keeping ourselves and our cameras dry. As soon as we walked through the door of the well known Coral Island amusements, we were greeted with an ideal ride for me to photograph for the kind of images I was after. Although I was nervous to set up my tripod in a public place, I set up my equipment facing a children’s train ride which had an interesting angle as the train went up an incline in the track. I was conscious of appearing strange from photographing a children’s ride, but my intention was for the train to be considerably blurred so none of the children would be identifiable anyway, and would have explained this had anyone asked. Typically once my equipment was set up, the few families that were around had moved on and so I had to wait patiently for another person to board the train. During this time I took a few test shots to find the appropriate exposure and focal length. It was difficult at first to get the timing and focus right, but after a while I think I managed to get some successful images. The only downside was that surrounding the ride were lots of obstructions such as signs, other attractions and pillars within the structure of the building, and so when editing these images I made a tight square crop to remove any distracting elements in the foreground and ensure the viewer’s focus would be on the motion blur of the train. Once I was happy with my shots, we moved on around the arcade; I decided to try and capture the movement of a classic British arcade game, the 10p slot machine, but the movement of the tray of coins was only quite small and the images didn’t look particularly effective. Due to the small number of people that were around, not many of the other machines were in action or seemed like they would provide an effective image, and so we took a break to think about what to do next. During this time I took a moment to take in my surroundings and my thoughts turned to Martin Parr; a couple with a young child appeared nearby and I quickly took the opportunity to take a candid photo of them enjoying the amusements, improvising by using the top of the machine behind to keep the camera steady as I didn’t have enough time to set the tripod back up before they moved! I didn’t want to seem invasive and so I then turned around and saw another person playing on the slot/gambling machines towards the adults area, and quickly snapped a picture of that side of the arcade, too. Then I realised I had just caught two juxtaposed images – one of the family side and one of the adult side – and thought that this would be an ideal context for a constructed image/multiple exposure!

After visiting a number of other arcades that were either completely quiet or the rides weren’t suitable for an image, we took a walk along one of the piers to see if that area was any more lively. Unfortunately it was just as quiet, but looking over at the iconic tower, I noticed the road along the bottom and thought I could possibly capture an interesting image of the dominating tower, with the movement of the cars passing below it. And so I set my tripod up outside; the exposure needed to be completely different here as the sky was very bright and overcast, compared to the darkness of the arcade, and so I spent a while experimenting and trying to get the shutter speed right. I got the shots but from my position it proved difficult to get the road in a prominent position within the composition while also getting the tower in shot, and so the images don’t really point towards the intention of capturing the movement of the cars unless you look closely. I then tried to get another image of moving cars by pointing the camera towards the exit of the pier, where the road could be seen with a stereotypical sign featuring a donkey hung above the doorway, and caught a couple of shots of cars driving past, almost illustrating the people leaving the resort under the sign saying “thank you for coming, see you again soon!” With the elements being against us, this marked the end of our trip and any more photo opportunities; although the shoot wasn’t as successful as we anticipated, I have been able to practice using my equipment and capturing movement, become more confident with photographing in public, and caught a couple of images that I think could be effective with some editing post-shutter.

This slideshow requires JavaScript.


DSC_0905 square

Probably the most successful image from the shoot, with a tight crop focusing on the ride itself

Martin Parr – RESEARCH – Enigma of Time

Martin Parr is a British documentary photographer, born in 1952 and based in Bristol/London, UK. He is most well known for his photographic projects that take an intimate and satirical look at the aspects of modern life. In particular he documents the social classes of England, drawing on stereotypes and society’s expectations. His work shows us how we live, how we present ourselves to others, and what we value in life; whether it be the food we eat, the clothes we wear, the things we buy or our leisure activities. His images show us the familiar in a way that we haven’t seen it before; it may be labelled as exaggerated or even grotesque, due to his unusual perspectives and strange motifs. His major projects include rural communities (1975–82), The Last Resort (1983–85), The Cost of Living (1987–89), Small World (1987–94) and Common Sense (1995–99).

The Last Resort was Parr’s first project that showed his work moving towards his now distinct personal style: it featured bright colours and vivid images, capturing the holidaymakers and tourists of New Brighton, which set alight his passion for observing society. The series has since become a modern classic. In contrast, Common Sense was a global project, and developed his technique further and gained him more recognition as a satirical photojournalist. The aim of the project was to highlight the idiosyncrasies of different contemporary cultures, such as a British cup of tea, a dazzling Hollywood smile and other similar cultural clichés.


“With photography, I like to create fiction out of reality. I try and do this by taking society’s natural prejudice and giving this a twist”

– Martin Parr


Ageing Flowers – VISUAL DEVELOPMENT – Enigma of Time

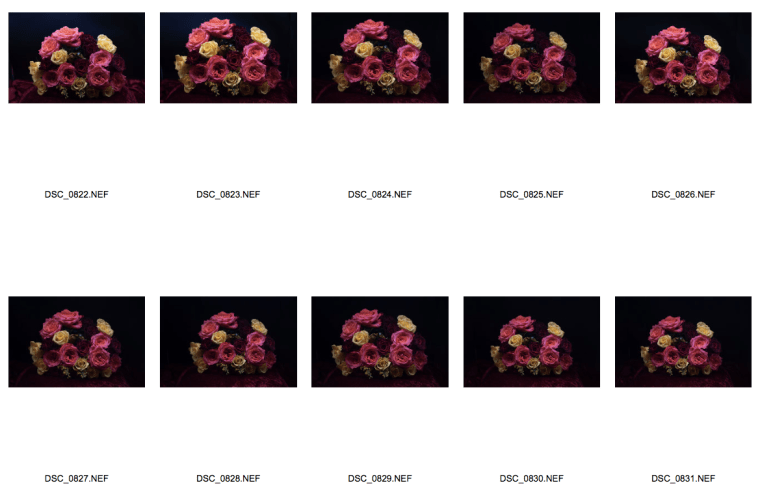
After realising that the bouquet of roses I bought were rather cliche for the Objects of Desire assignment, I decided to use what I already had and try out an idea for another assignment: photographing the same flowers in the same position as they aged, and placing the new and old images side by side to show the ageing process and how time affects everyone and everything in the world, slowly decaying nature. This could be described as “enigmatic” because it is mysterious and interesting how time affects everything differently and at different rates; the lifespan for flowers, for example, is a lot shorter than the average human lifespan, and time affects flowers and nature at a much more rapid rate.

I chose the photo from the previous shoot that had the most impact on my peers to replicate for this experiment. Using my home studio with the same background roll and the same red velvet material from the previous shoot, I did my best to replicate the entire set-up as closely as possible and place the flowers in exactly the same way, photographing from similar angles. I opened the original image in Lightroom to view the metadata to set the shutter speed, ISO and aperture on my camera to the same settings as the last one, to get the closest possible exposure. It was hard to remember the positioning of the lighting the first time around, but I experimented with it until I got a similar result. Of course it was hard to get everything exactly identical, but I’m happy with my efforts. Due to the nature of trying to recreate one particular image, there isn’t as much noticeable variety between images as they needed to be shot from the same angle and same composition; the differences are more subtle such as tiny lighting and angle adjustments.

At this point, the flowers were around 10 days old and had opened up beautifully into large roses with soft petals. One particular yellow rose near the middle of the bouquet had begun to turn brown; this was when I decided I would allow the flowers to continue to grow for a bit longer, with the hope that more of the petals would turn brown as they aged and demonstrate the ageing process even clearer.

Screen Shot 2019-04-06 at 16.57.55


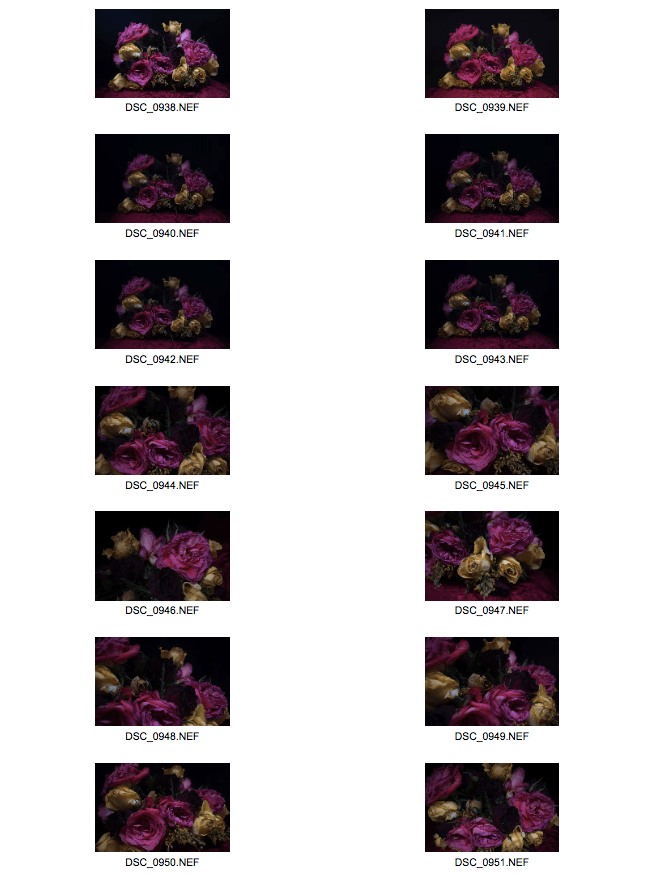
Further development (20/03/19) – I gave the flowers another week to continue the ageing process; although the petals didn’t turn as brown as I had hoped, the flowers were evidently past their best and were wilting and losing their shape and colour, meaning the element of time is still clear in the images. These images were again shot in the same environment with the same exposure, as closely to the previous two shoots as possible. I also took a few close-ups shots to see more clearly how the flowers had aged and changed. I think if I was to use these for my final submission, the comparison between the first and last image would have the greatest impact and show the largest time frame. Perhaps the middle shoot isn’t as relevant as it makes the ageing process look slower, more gradual and less effective, whereas the beginning and end give a bigger impact when comparing side by side as there is a more drastic change.

Screen Shot 2019-04-06 at 17.09.42

The Photographer’s Eye: Lecture Notes

This module is focused on the book titled The Photographer’s Eye by John Surkowski. The book outlines the 5 key characteristics that produce a successful photograph:

  • The thing itself
  • The detail
  • The frame
  • The time
  • The vantage point

The thing itself (photographs) are different from reality – reality can be filtered, clarified or exaggerated and allows for the creation of fantasy.

‘The detail’ refers to the use of photography to capture things that are too ‘ordinary’ to paint; details can’t narrate but they are symbolic and evocative for the viewer.

‘The frame’ encourages the photographer to choose and eliminate the frame to focus on particular subjects. New relationships can be formed by isolating subjects from the background.

‘The time’ explains how photographs can only describe the present, at the exact moment of the ‘click’ of the shutter. Therefore, photographs will always be in the past when viewed.

Cameras allow for different vantage points to painting as they are more portable and a variety of angles can be taken by handholding a camera, rather than painting with an easel.

Project 1: Objects of Desire

Transform an everyday object into an ‘Object of Desire.’ This could be achieved by taking the route towards studio still life photography. A bigger light source will remove any unwanted shadows in these images.

Photographers:

  • Richard Maxted
  • Association of Photography (AOP)
  • Simon Larbalestier
  • Carol Sharpe
  • Adrian Lyon
  • Wilson Hennessy
  • Tal Silverman

Project 2: The Enigma of Time

Use ‘time’ somehow in your images.

Photographers:

  • Francesca Woodman
  • Catriona Grant
  • David Scheinmann
  • Alexey Titarenko
  • Michael Wesely
  • Duane Michals
  • Gina Glover
  • Bill Brandt

Project 3: Constructed Images

Construct images using any of the following:

  • Multiple Exposure
  • Multiple Printing
  • Montage
  • Image and Text
  • Mirrors
  • Layers

Photographers:

  • Hannah Hoch
  • Man Ray & Dora Marr
  • Herbert Bayer
  • John Stezaker
  • Barbara Kruger
  • Paul Hill
  • Abelardo Morell
  • Mindo Cikanavicius
  • Zander Olsen
  • Robin Maddocks
  • Oleg Oprisco
  • Gillian Wearing
  • Loretta Lux

The History of Photography

There are various dates that contribute to the birth of photography. According to history books, photography began in 1839. However, it is said that Joseph Nicephore Niepce took the first photo that still exists back in 1827. Then, Hercules Florence first used the word ‘photography’ in 1832.

Prehistories

Among the first photographic processes were Paleoloithic cave paintings dating all the way back to 10,000BCE.

There are early written records of experiments with light and the Camera Obscura from 1,000BCE. Photographers such as Johannes Vermeer began using the Camera Obscura within their practice from 1,500BC.

70CE – Roman chemistry experiments.

1,100CE – The Alchemists used light to darken silver salts.

1,717 – Johann Schulze experimented with “fleeting sun pictures.”

1790 – Thomas Wedgwood experimented with the Camera Obscura and silver nitrate sun prints.

The Camera Lucida was invented by Dr William Hyde Wollaston in 1807.

The first photograph of a person was taken by Louis Daguerre in Paris in 1838, where a man is pictured having his shoes shined on the pavement next to the road.

William Henry Fox Talbot took his first image titled “The Oriel Window” in 1835, and created the world’s first photo book called “The Pencil of Nature.”

In 1847 the law in France considered photography as a ‘mechanical process’ and not art.

Up to 1851, the Daguerreotype was “the technology.”

Frederick Scott Archer provided the breakthrough in 1851: the Collodion glass negative, with the advantage of detail and speed.

Roger Fenton used the wet Collodion process and a portable darkroom in 1855.

In 1871, Richard Leach Maddox invented lightweight gelatine dry plates which were a revolution at the time!

Further research then lead to snapshot photography and the Kodak camera with roll film.

The Portrait

The literal definition of a portrait is: a drawing, painting or photograph of a person. A more accurate definition, however, would be: a representation of a person. Ask yourself: Does it simply record the outer surface, or provide insight into their character?

Cindy Sherman dresses up in various costumes and poses for her photos, frequently portraying female stereotypes found in film, television, and advertising. However she does not label these as “self portraits” because in that moment she is interpreting another person, not her genuine self.

Robert Cornelius produced the world’s first deliberate portrait in 1839.

David Bailey is another huge name in portrait and fashion photography, and is best known for his iconic portraits of artists, musicians and actors of the 1960s and 1970s, such as Andy Warhol and the Rolling Stones.

Other Portrait photographers include:

  • Diane Arbus
  • Garry Winogrand
  • W. Eugene Smith
  • Richard Avedon
  • Philip Lorca DiCorcia
  • Adrienne Norman
  • Astrid Schulz
  • Steve McCurry
  • William Wegman

The Self Portrait

David Slater is a British wildlife photographer; he is most famous for his image of “the monkey that took its own photograph.” On a trip to Indonesia, he was following a group of Sulawesi macaques in the forest, in an attempt to connect with them and co-exist peacefully with them, while of course photographing them along the way. After a long day, Slater sat down close by to the group of monkeys for a rest, while they were having a group grooming session. Soon enough, the monkeys came closer and become grooming him too! They also took a liking to his camera and so the photographer placed the camera on his tripod with a very wide angle lens, predictive autofocus and a flashgun set, in the hopes of capturing a facial close up. His efforts were worthwhile as the monkeys began grinning and pulling faces in the lens of the camera, pressing all of the buttons and inevitably some photographs and “self portraits” were taken, including the iconic photo we now recognise today! However, his photo has caused Slater a lot of financial difficulty as he has been frequently dragged through the courts over the debate of copyright of the image; is Slater right to claim ownership of the image, or does the copyright belong to the monkey itself as he was the one who pressed the shutter?! This debate has opened up an interesting conversation about copyright and what is technically defined as a “self portrait.”
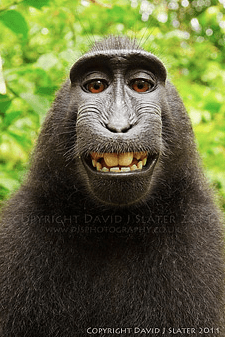
Screen Shot 2019-04-06 at 19.40.42

Francesca Woodman photographed herself in empty interiors, often nude or semi-nude, to portray her suffering with mental illness such as anxiety and depression. However, her pictures are not traditional self-portraits. In her images, she is usually half hidden by objects or furniture, or she appears as a ghostly blur. She plays with distorting reality into a surreal fantasy by squeezing herself into small cupboards or wrapping herself under wallpaper like a blanket; she often seems to be retreating and hiding within the materials of the building. The images create an underlying sense of human fragility, vulnerability and isolation, which is further exaggerated by the fact that the photographs are printed on a very small scale, making them seem personal and intimate. These images connect with me personally as I know how it feels to battle your own demons and I completely understand and am inspired by how Woodman can capture her inner feelings within a physical image.

Other Self Portrait photographers include:

  • Peter Kennard and Cat Picton
  • Hippolyte Bayard – took the first known self portrait
  • Nan Goldin
  • Claude Cahun – inspired by Cindy Sherman
  • Dorothy Wilding – first female photographer for a royal household
  • Marta Hoepffner
  • Vivian Maier
  • Wanda Wulz
  • Arno Rafael Minkkinen
  • Yves Klein
  • Lee Friedlander
  • Duane Michals
  • Phillip Toledano

The Place

“Place” refers to vast open spaces and landscapes. It includes mainly nature photography but it can also include man-made structures and urban areas; it has a very broad and flexible definition. When photographing a landscape, cutting out the sky can change it from simple being “a view” to a landscape photograph – framing is important!

There are four main types of landscape:

  • Natural landscape
  • Urban landscape
  • Social landscape (e.g street photography)
  • Psychological or Emotional landscapes (inner landscapes)

Robert Adams, a landscape photographer, said that there are three main elements to photographing places: Geography, Autobiography and Metaphor. Taken together, they strengthen and reinforce each other and create a successful and powerful photograph.

Pre-17th Century, landscape was confined only to the backgrounds of other genres. But after the 18th Century, there were three types of landscape photography:

  • The Sublime – awesome sights, nature at its most fearsome.
  • The Beautiful/Pastoral – inhabited landscape, smooth and ordered.
  • The Picturesque – ruins and incomplete buildings, gives an edgy feel.

Edward Burtynsky photographs manufactured and industrial landscapes, such as factories. He documents people and their place in relation to the world, and their impact on the environment. He photographs quarries and mines which document extraction in the landscape – begging the question “how long will our oils and fuels last if we continue?” He also photographs pollution, rubbish, recycling materials and landfill sites. Large factories are placed in our environment due to our consumer lifestyle; as humans, we use and dispose of things all the time. Man-made structures include roads, houses and cars which are also mass-produced and take a toll on the environment. However, Burtynsky wants to show that even industrial, urban or conventionally unattractive places can appear beautiful through a lens and the power of photography; landscapes don’t always have to be “beautiful” and “perfect.” His work is Post-New Topographics, the book of photographers that also photograph urban landscapes and focus on how humans are affecting and damaging the planet. He uses large format prints to capture every detail and make sure it’s visible.

Landscape photographers include:

  • Ansel Adams
  • Jitka Hanzlova
  • Liza Dracup
  • Albert Bierstadt
  • Noemie Goudal
  • Eugene Atget
  • Bill Brandt
  • Lewis Baltz
  • Stephen Shore
  • Bernd and Hilla Becher
  • Joel Sternfeld
  • Simon Roberts
  • Rut Blees Luxemburg
  • Edward Burtynsky
  • Richard Mosse
  • Ed Rusha


Historical Villages of Eyam & Castleton – VISUAL DEVELOPMENT – The Enigma of Time

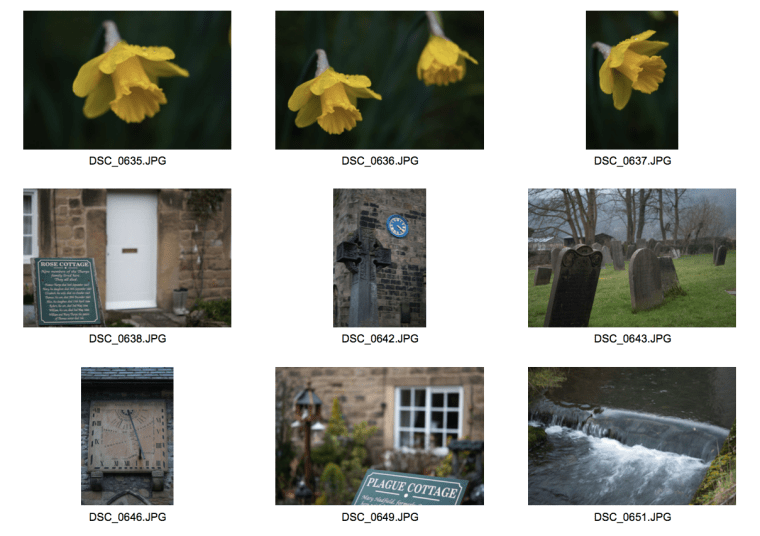
After being inspired by Eugene Atget and making the decision to photograph historical locations, I embarked on a trip to “The Plague Village” of Eyam to document the village’s dark history of the Plague or “Black Death.” After the disease was brought to the village from London in a piece of infected cloth in 1665, villagers selflessly decided to seal themselves off from the rest of the country and the outside world to avoid spreading the deadly disease to others, and the village still tells this story to this day. There are many plaques and boards detailing the story and the methods used to contain the disease, as well as monumental landmarks including the ones I visited and photographed, such as: the Plague Cottages where the victims of the disease once lived and modern families now inhabit; the Church of St Lawrence which dates back to Saxon times and features an eighth-century Celtic Cross and churchyard; and an old traditional Sheep Roast, plus many more attractions such as the museum which were unfortunately closed when I visited. I used my Nikkor Micro Prime Lens with a wide aperture to create an effective, shallow depth of field and focus on certain parts of the image, such as the “Plague Cottage” plaques to explain the backstory within the image and give some context.

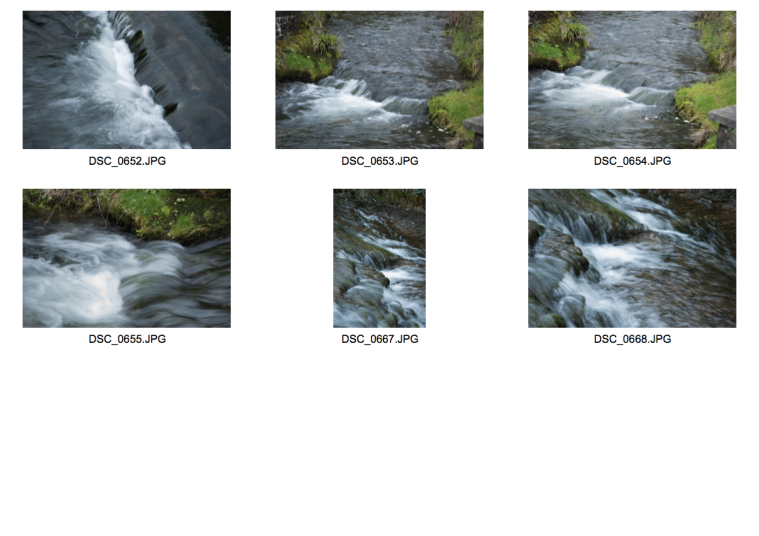
Afterwards, I visited the nearby village of Castleton and took a stroll along a lake, capturing the moving water using a slow shutter speed of about 1/8th of a second, and balancing the camera on the stone wall to minimise camera shake. I also took the opportunity to photograph some dandelions with a shallow depth of field which were inspired by Atget’s photographs of flowers in a similar style.

Here are the original images:

This slideshow requires JavaScript.

Next, I narrowed down the most successful images and edited them in Camera Raw, ensuring none of the highlights or shadows were blown out with the clipping warnings, adjusting the exposure and straightening any horizontal or vertical lines that needed tidying up. Below are the final images:

Screen Shot 2019-03-03 at 04.05.37Screen Shot 2019-03-03 at 04.05.48