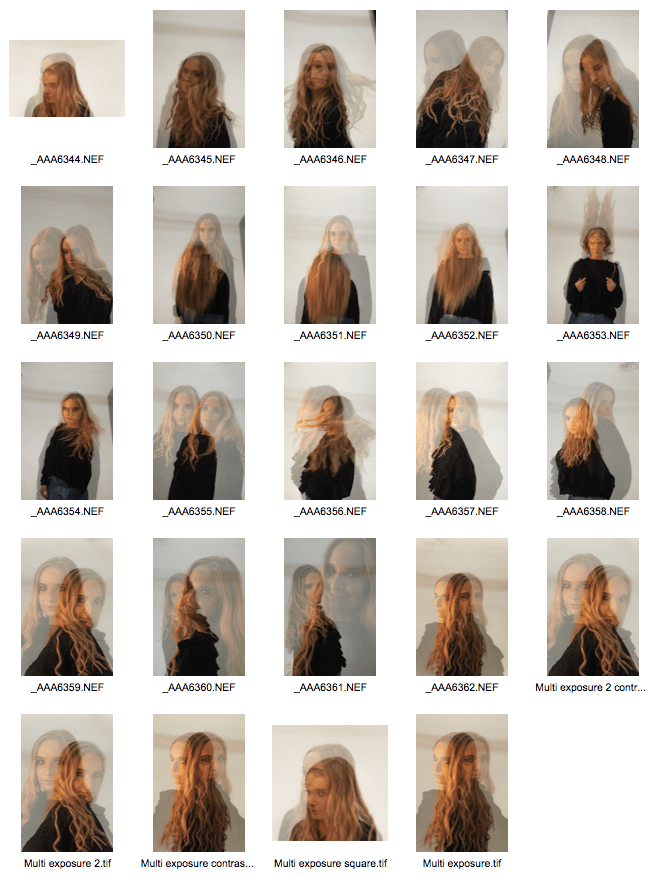
For the Constructed Image, I wanted to experiment with multiple exposures as I really like the effect they give with layering multiple images onto one frame. I wanted to do this properly and authentically by doing the exposures within the camera, rather than taking the easy route and merging two photos together on Photoshop post-shutter. I booked one of the studios at the university, with the lighting rig in H34, and took along one of my peers so we could experiment with the lighting, and also undertake some shoots for our assignments. I brought along my own camera, however this didn’t have the multiple exposure feature, and so I used the camera that came with the kit as this did have the correct feature. I set the camera to two exposures, used the light meter to set the correct exposure, and began shooting multiple poses to find the most effective combination for this process. I found that the first few images with the subject overlapping twice made the two images difficult to distinguish and kind of distorted the image, so this wasn’t successful. I then tried to get the subject in both halves of the frame, so that both images could be seen. Another trick we tried was a hair flick, to freeze the movement of the hair and overlap this with a static image. I think the most successful images are the ones towards the end of the contact sheet, where the subject appears in both halves of the frame with effective postures. The one labelled “Multi exposure 2 contrast.tif” is my favourite at this point as the subjects eyes can be seen on both sides and this creates a connection with the viewer.
Intrigued by the process and results of multiple exposures, I also decided to experiment with a couple of pictures that I took in Blackpool. I imported the two candid pictures that I took, similar to the style of Martin Parr, into Photoshop and changed the opacity so that one image overlapped the other, with both of them still being visible. I tried both ways around with one image on the top layer and one on the bottom layer, then vice versa, to find the most effective composition. I also altered the opacity percentage to find the most effective setting. Combining the images adds to the juxtaposition of the family area of the arcade vs. the adult, gambling side. This was the result:

